

if you want to connect to the internet with High security, excellent privacy, and without any Geo restriction, you are supposed to download VPN. despite their benefits, VPN users often encounter VPN not connecting issues that can be frustrating and disrupt their online activities. This article is a comprehensive troubleshooting guide to help users resolve this common VPN connectivity and VPN not working problems and get their VPN up and running smoothly.
Common VPN Connectivity Issues
VPN not connecting at all
It is common for people to encounter problems connecting to their Windows 10 or Windows 11 VPN service. When they try to connect, the VPN may start out saying “connecting” but eventually time out.
Start by typing in Services, open the Services app, and then scroll all the way down to the bottom of the page and you will see the Xbox Live Networking Service.
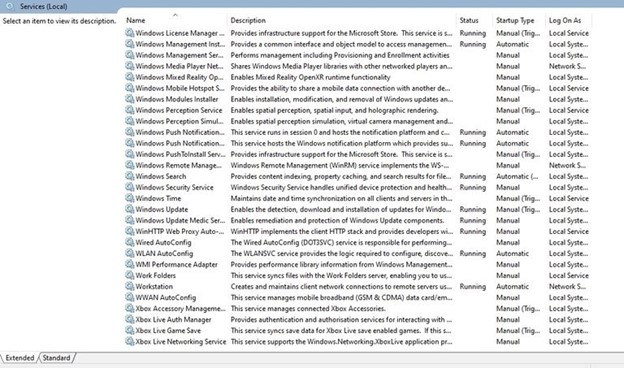
To stop the service from running, right-click the Xbox Live Networking Service, and then select Stop from the menu. Your VPN will not be able to connect if it is running. You can now go and try again to connect to your VPN once you have done that, and you will notice that the word “Running” will be removed from the column next to the service.
There should be no problems connecting this time, but keep in mind that if the live networking service is disconnected you may be unable to use certain Xbox in-game features. Then, once you are finished with your VPN, you will need to click the Xbox Live Networking Service button again, then click the Run button, then click OK.
Getting connected to your VPN still doesn’t work may be the result of your Internet Service Provider blocking your VPN connection. If your ISP blocks the VPN connection, your VPN connection will not work. The DNS (Domain Name Server) entries from your ISP might be incorrect, so you will need to clear your internet cache and “flush” your DNS entries if that is the case.
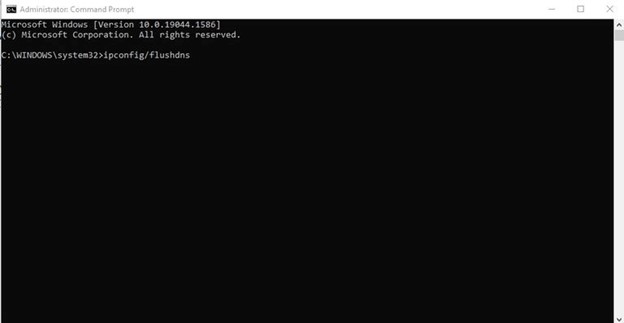
As soon as the process has been completed, a message should appear stating that you have successfully flushed the DNS Resolver Cache on your Windows IP Configuration. The Command Prompt program can be closed by left clicking on the cross in the top right corner and then opening a web browser afterward.
The Clear Recent History dialogue box will appear if you hold down the Shift, CTRL, and Delete buttons on your keyboard all at the same time. Next to the Time range to clear, select Everything and tick only the Cache and Cookies boxes.
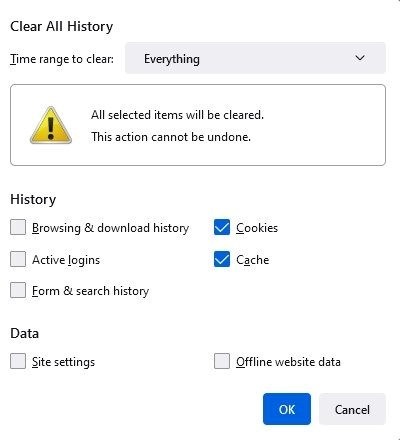
Then you can click the Okay button; it might also say Clear Now (CTRL + Shift + Delete) on any web browser should open the dialog box. When you’re finished, try connecting to your VPN once more.
VPN disconnecting frequently
In order to prevent your VPN from disconnecting, you should do the following in order to stabilize your internet connection so your VPN will not disconnect with no warning:
- Try switching to a VPN server in another location
- Try a different DNS server It is worth changing your DNS server to see if it is your service provider’s DNS server at fault.
- Changing custom DNS servers is easy in the preferences section, but remember that it exposes you to a higher risk of DNS leaks. Look into switching VPN protocols instead.
- Contact your VPN’s customer service if you are still having issues regarding your VPN connection.
- If you are still having problems, check whether your firewall or antivirus software is interfering with your VPN connection.
Slow VPN connection speeds
You might be able to connect to a server through your VPN at times, but then the connection speed is so slow that you can’t do anything anyway. It’s possible that you are simply connecting to a server that is too far away if that happens. One thing to remember with VPNs is that the closer the VPN server you are using, the faster your connection will be.
If it doesn’t improve the speed, make sure you turn them back on again before continuing. If it doesn’t, it might be your antivirus or firewall that is slowing down the VPN connection too. In the event you find yourself still struggling to connect to your VPN, try resetting it to its factory settings and then restarting your computer. It might sound corny and cliche, but sometimes that is really all it takes – the classic “turn it off and turn it back on again” approach.
VPN not bypassing geo-restrictions or censorship
One of the major problems that you may face is that VPN does not remove geo-restrictions. To solve this problem, you need to change the geographic region of the server
Basic Troubleshooting Steps
Checking internet connectivity and running connection tests
Your internet connection is dropping out so often that you are not able to connect to your VPN properly. Here are four things you can do to help restore your internet connection:
You can reconnect to your Wi-Fi network, restart your router, and check your router’s ethernet cable for damage. If you still need help restoring your connection, call your internet service provider (ISP).
To protect your privacy, VPN’s built-in Kill Switch feature will take all of your devices offline immediately if VPN disconnects due to an unstable connection.
Restarting the VPN client or device
NordVPN software, like all software, can crash, experience glitches, and have bugs sometimes. If you suspect that there is a bug, you may want to participate in our Bug Bounty program if you want to investigate it further. If you’re right – you will be rewarded!
Make sure you have the latest version of your app (premium providers like VPN regularly test to catch and fix bugs as soon as possible). If the problem persists, you may want to try resetting or reinstalling your software. Also, you might want to close some background programs and free up some disk space.
If you suspect something is wrong with your VPN settings, you can easily reset them to default. Consider updating your VPN software regularly as well.
Updating the VPN client or firmware to the latest version
Here are the general steps you can follow to reinstall your VPN app after it has been updated. Any bugs or security vulnerabilities will be fixed in this updated version.
If you already have a VPN, uninstall it, and After that, restart your device to make sure any remaining app data is gone. Download and install the latest version from your VPN provider or app store. Open the reinstalled VPN app and sign in. Try connecting to the VPN server again, configure the VPN settings as needed.
Checking for conflicts with other security software
If your firewall is blocking the VPN connection, it can result in connectivity issues. You may want to check that if you think your firewall is blocking VPN traffic or preventing the VPN client from connecting to your server. If you think your firewall, including Windows Defender Firewall, is blocking you, try temporarily disabling it or setting up an exception for the VPN client.
As a system protection tool, antivirus software can interfere with VPN operations when it misinterprets encryption activities as suspicious. You may need to adjust your antivirus settings so that your VPN software is accepted. This can be done by lowering its level of security for the VPN or adding the VPN app to a whitelist. Consult your antivirus documentation for further assistance.
Switching between different VPN protocols or encryption levels
The protocol you use to connect to the VPN can change to solve connectivity and speed problems. Try switching to a different protocol since it uses it by default. It also offers OpenVPN, a reliable protocol that’s also known for its reliability, so do try it out instead. You have to open specific ports to make a VPN work. A VPN usually uses UDP port 500 and TCP port 443 as connection ports. Whenever you try connecting, you might experience connectivity problems. You can check if the necessary ports are open or try changing the default ports.
You must open 443 TCP and 1194 UDP ports for VPN to work. Your firewall or router must also allow VPN passthrough. In your router settings, you can activate VPN passthrough for different protocols. VPN does not offer port forwarding. It blocks all ports except those needed to operate your VPN software. This makes you safer, since open ports can cause a lot of security problems.
Checking for IP/DNS leaks and enabling additional security features
Keeping your IP address concealed is one function of a VPN, and a simple manual IP leak test can determine whether your IP address is secure or not. Follow the steps below to test your VPN:
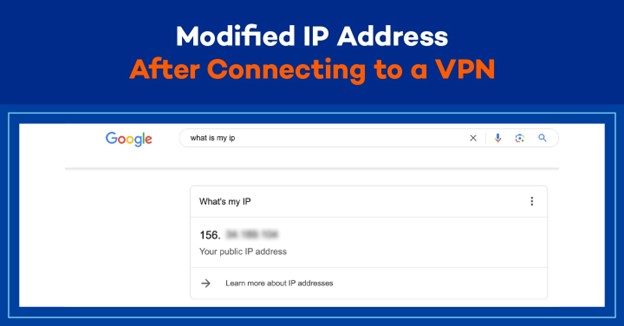
- If you want to know what your IP address is, go to Google and enter “What is my IP”, write down your IP address, and then open your VPN application and activate it.
- Check your IP address again on Google. You can confirm your changed IP address by comparing your original IP address (before connecting to the VPN) to the new address (after connecting to the VPN.
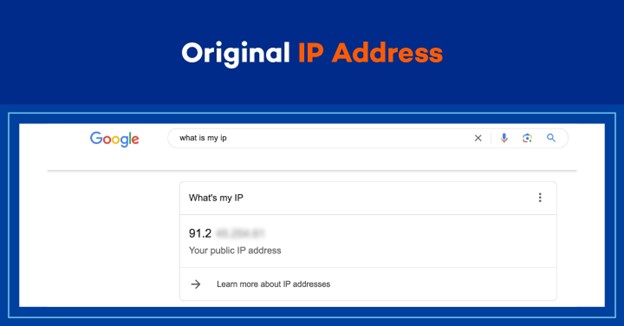
- As a result, if your IP address remains the same even after you have connected to the VPN, you have a VPN leak, as the name suggests.
You can try these things to fix your true IP address if it leaks through the VPN application and device. You can sometimes resolve temporary glitches if you’re properly connected to the VPN server. Try temporarily disabling your firewall or antivirus to see if this fixes the leak. Consult your software documentation or firewall settings to adjust them for VPN compatibility.
How to Check for DNS Leaks
When you search geo-restricted sites with your server set in a different location, you can detect DNS leaks similar to checking your VPN for a protected IP address.
- Activate your VPN and sign in.
Visit a geo-restricted website. Netflix.com is available in over 190 countries, but the content varies depending on your location. You may have a DNS leak if you are unable to access a website that offers content exclusively available in a foreign country. In order to catch any vulnerabilities that might have slipped through the cracks, it is a good idea to go a step further and test with a tool like DNSLeakTest in order to catch any bugs.
- When your VPN is off, go to DNSLeakTest.com, which will display your IP address and general location. Choose the “Standard Test” option.

4. If the IP addresses of the domains appear different from those in the first step, you may have a DNS leak. Take a photo or write them down. Turn on your VPN again and run another test.
In case you suspect you have a DNS leak, follow these steps in order to protect your connection:
- If you discover a DNS leak, you should check your VPN settings first. Many VPNs offer built-in DNS leak protection. Using your own private DNS servers can also improve security if you configure your VPN to do so.
- If you use an older version of your VPN application, it can sometimes lead to leaks. Make sure you’re using the latest version of the VPN application. Reinstalling the VPN entirely can fix internal software problems that might be causing the leak.
- It is advisable to contact the customer support of your VPN provider if neither of these solutions work or you wish to prevent DNS leaks in the future. They may have specific troubleshooting steps to resolve your query or may recommend alternative configurations to you.
Advanced Troubleshooting Techniques
Configuring network settings
You need to review and align your network settings so that your VPN provider recommends those settings so that you can successfully connect. This can be achieved by reviewing the VPN provider’s recommendations on how you should configure your network.
Flushing DNS and resetting network adapters
Another way to fix the VPN problem and fix the connection to the Internet using it is Flushing DNS and resetting network adapters. This will help your system to be initialized
Contacting VPN provider support for assistance
Finally, if you use all these ways and your VPN problem is not solved, you should contact VPN support so that you can connect to VPN and the Internet easily.
Preventing Future Connectivity Issues
Choosing a reliable and reputable VPN provider
VPN providers must be trusted by users, which means they have to examine their logging policies, jurisdiction, and history of handling their users’ data. If providers do not adhere to strict no-log policies, or if they operate in jurisdictions with invasive data retention laws, anonymity could be compromised.
Regularly updating the VPN client and device software/firmware
Regularly updating the VPN client and device software/firmware can help minimize the possibility of possible errors, so be sure to do this.
Optimizing network settings for better VPN performance
If you are looking for better VPN performance, then take Optimizing network settings for better VPN performance seriously and pay special attention to it.
Avoiding bandwidth-intensive activities that could slow down the VPN connection
Avoiding bandwidth-intensive activities that could slow down the VPN connection and make your experience using VPN and the Internet very bad.
Enabling automatic reconnection and other safety features in the VPN client
To improve your VPN performance, Enabling automatic reconnection and other safety features in the VPN client, these features include kill switch or obfuscation.
Monitoring VPN server statuses and selecting optimal server locations
Finally, in order to choose a suitable and fast server, Monitoring VPN server statuses and selecting optimal server locations will allow you to find out about problems faster and have a better experience while using them.
When to Seek Professional Help
Suspected security breaches or data leaks
When you are troubleshooting, you should Suspected security breaches or data leaks because these things can cause problems and cause your VPN speed to decrease significantly or even the target server to be blocked completely.
Compatibility issues with specific applications or services
Compatibility issues with specific applications or services is another thing to pay special attention to when checking the reasons why is my VPN not connecting.
Conclusion
When your VPN not connecting, you should check it carefully and take steps such as Checking internet connectivity and running connection tests, Restarting the VPN client or device, Updating the VPN client or firmware to the latest version, and Checking for conflicts with other security software. Remove Switching between different VPN protocols or encryption levels and Checking for IP/DNS leaks and enabling additional security features. Of course, it is better to prevent problems before they occur by updating the software or optimizing the settings. Finally, if the problem is not solved, it is better to contact the service provider and its support so that you can solve the existing problem as soon as possible.